Folding Diagrams for the 4-Leaf Clover (All 36 Steps)

 Designed by Marie Tessier;
Diagrams by Marie Tessier
and Jasper.
The 4-Leaf Clover is an intermediate model that takes 20-40 minutes to make.
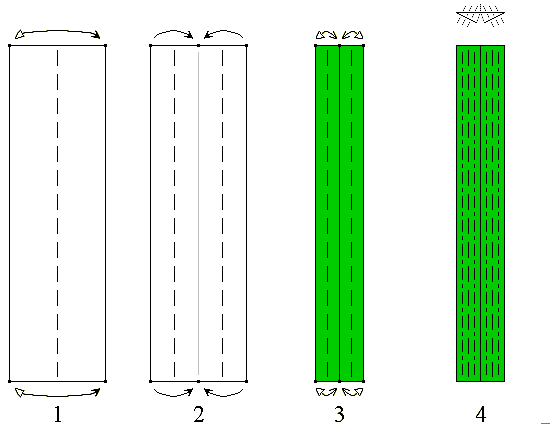
Start with a 1 x 3 rectangle, white side up.
A longer rectangle makes a longer stem.
A shorter rectangle (like a dollar bill) makes a shorter stem.
A 2" x 6" (5 cm x 15 cm) rectangle makes
a model 1 ¼ " (3 cm) across x 1 ½ " (4 cm) tall.
The instructions are quite detailed. If they give you any difficulty, please
let Jasper know.

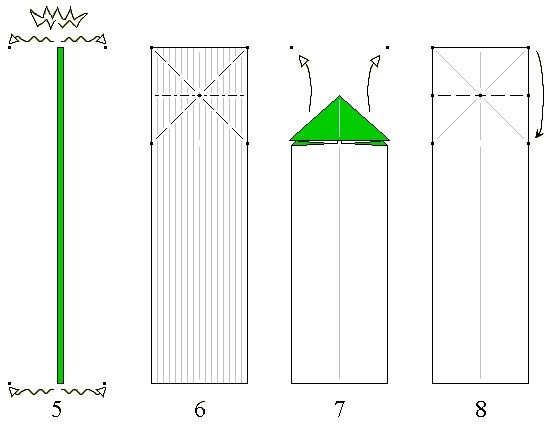
- Unfold completely.
- (The white side is up.)
Make a waterbomb base
at the top end of the paper.
- Unfold completely.
- (The white side is up.)
Valley fold
the top rectangle downward.
|

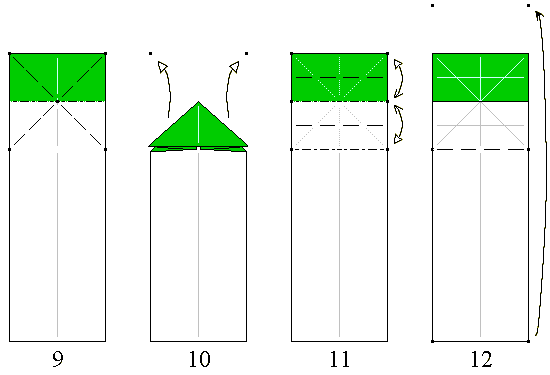
- Open out both sides.
- Wrap the upper layer around the stem.
- Lift and pleat the stem on existing creases.
- Finish pleating the stem, including inside the
squash folds.
Raise the stem to be vertical.
|

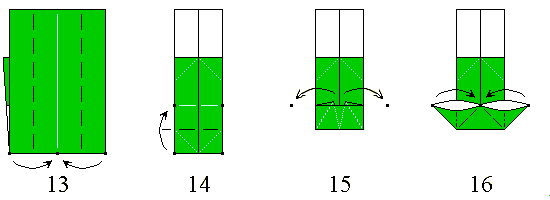
- Fold in both sides. The paper goes underneath the
squash folds and the stem.
- Valley fold
through all layers, on existing creases. (Similar to Step 14.)
- Pull out the corners. (Similar to Step 15.)
- Squash fold.
(Similar to Step 16.)
|

- Turn over.
- (Stem side down.)
Valley fold
the corners to the center, while letting the loose paper flip out.
- Turn over.
- (Stem side up.)
|

- (Detail view.)
Valley fold.
- Wrap the middle layer around the point.
- The point is now inside a pocket.
Valley fold
(both the point and the pocket together) back to the center.
- The point is locked.
|

- (Reduced view.)
Repeat Steps 29-32 on the other 3 sides.
- -35. Round the corners with
valley folds
and/or reverse folds.
Twist and curl the stem.
Turn over.
- The finished 4-Leaf Clover.
|

 Designed by Marie Tessier;
Diagrams by Marie Tessier
and Jasper.
 Designed by Marie Tessier;
Diagrams by Marie Tessier
and Jasper.


