Folding Diagrams for the
Prayer Fold (Last 5 Steps) and
Waterbomb Base (All 14 Steps)

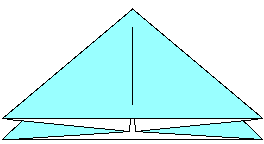
Nearly finished base

A traditional base, as diagrammed by Jasper.
The waterbomb base is a simple fold that takes 1-3 minutes to make.
This base is used in the waterbomb, iris, frog, and many other models.
A six inch (15 cm) square makes a 6 " x 3 " (15 cm x 7 1/2 cm) base.
The instructions are quite detailed. If they give you any difficulty, please let me know.


An Outline of the Diagrams:


The Diagrams:

Diagrams for steps 1-3.
  1. If you want the colored side out
    start with a square, colored side up.
    Valley fold horizontally,
    so that the top edge lines up with the bottom edge...
  2. ...valley fold in progress...
  3. ...valley fold in progress.
Diagrams for steps 4-6.
  1. Unfold, so that the colored side is up.
  2. Valley fold, and unfold, vertically.
  3. Turn the model over,
    so that the white side is up.
Diagrams for steps 7-10.
  1. Valley fold diagonally.
    The two opposite corners will line up;
    the crease runs from a corner,
    through the center, to the other corner.
  2. Unfold, so that the white side is up.
  3. Valley fold, and unfold,
    the other main diagonal.
  4. The white side should still be up.
    Begin the "prayer fold":
    Holding the bottom edge flat,
    lift up the left and right sides...
Diagrams for steps 11-14.
  1. ...as you lift the edges, they will pinch together.
    The top edge will lift up...
  2. ...bring the side angles in to the centerline...
  3. ...and flatten the model.
  4. The finished waterbomb base.

    Steps 10-14 are called a "prayer fold",
    possibly because the simultaneous inside reverse folds
    bring the folders' hands together in a motion similar
    to a gesture used in many prayers.

Navigational Assistance:


[ Home page | Origami Menagerie | Instructions | Comments ]

A traditional base. Diagrammed by Jasper in 1996.
Copyright 1995-99 by Jasper (aka John Paulsen). Your comments are welcomed.
Last updated July 23, 1999.